Winter Hiking Tips for Beginners
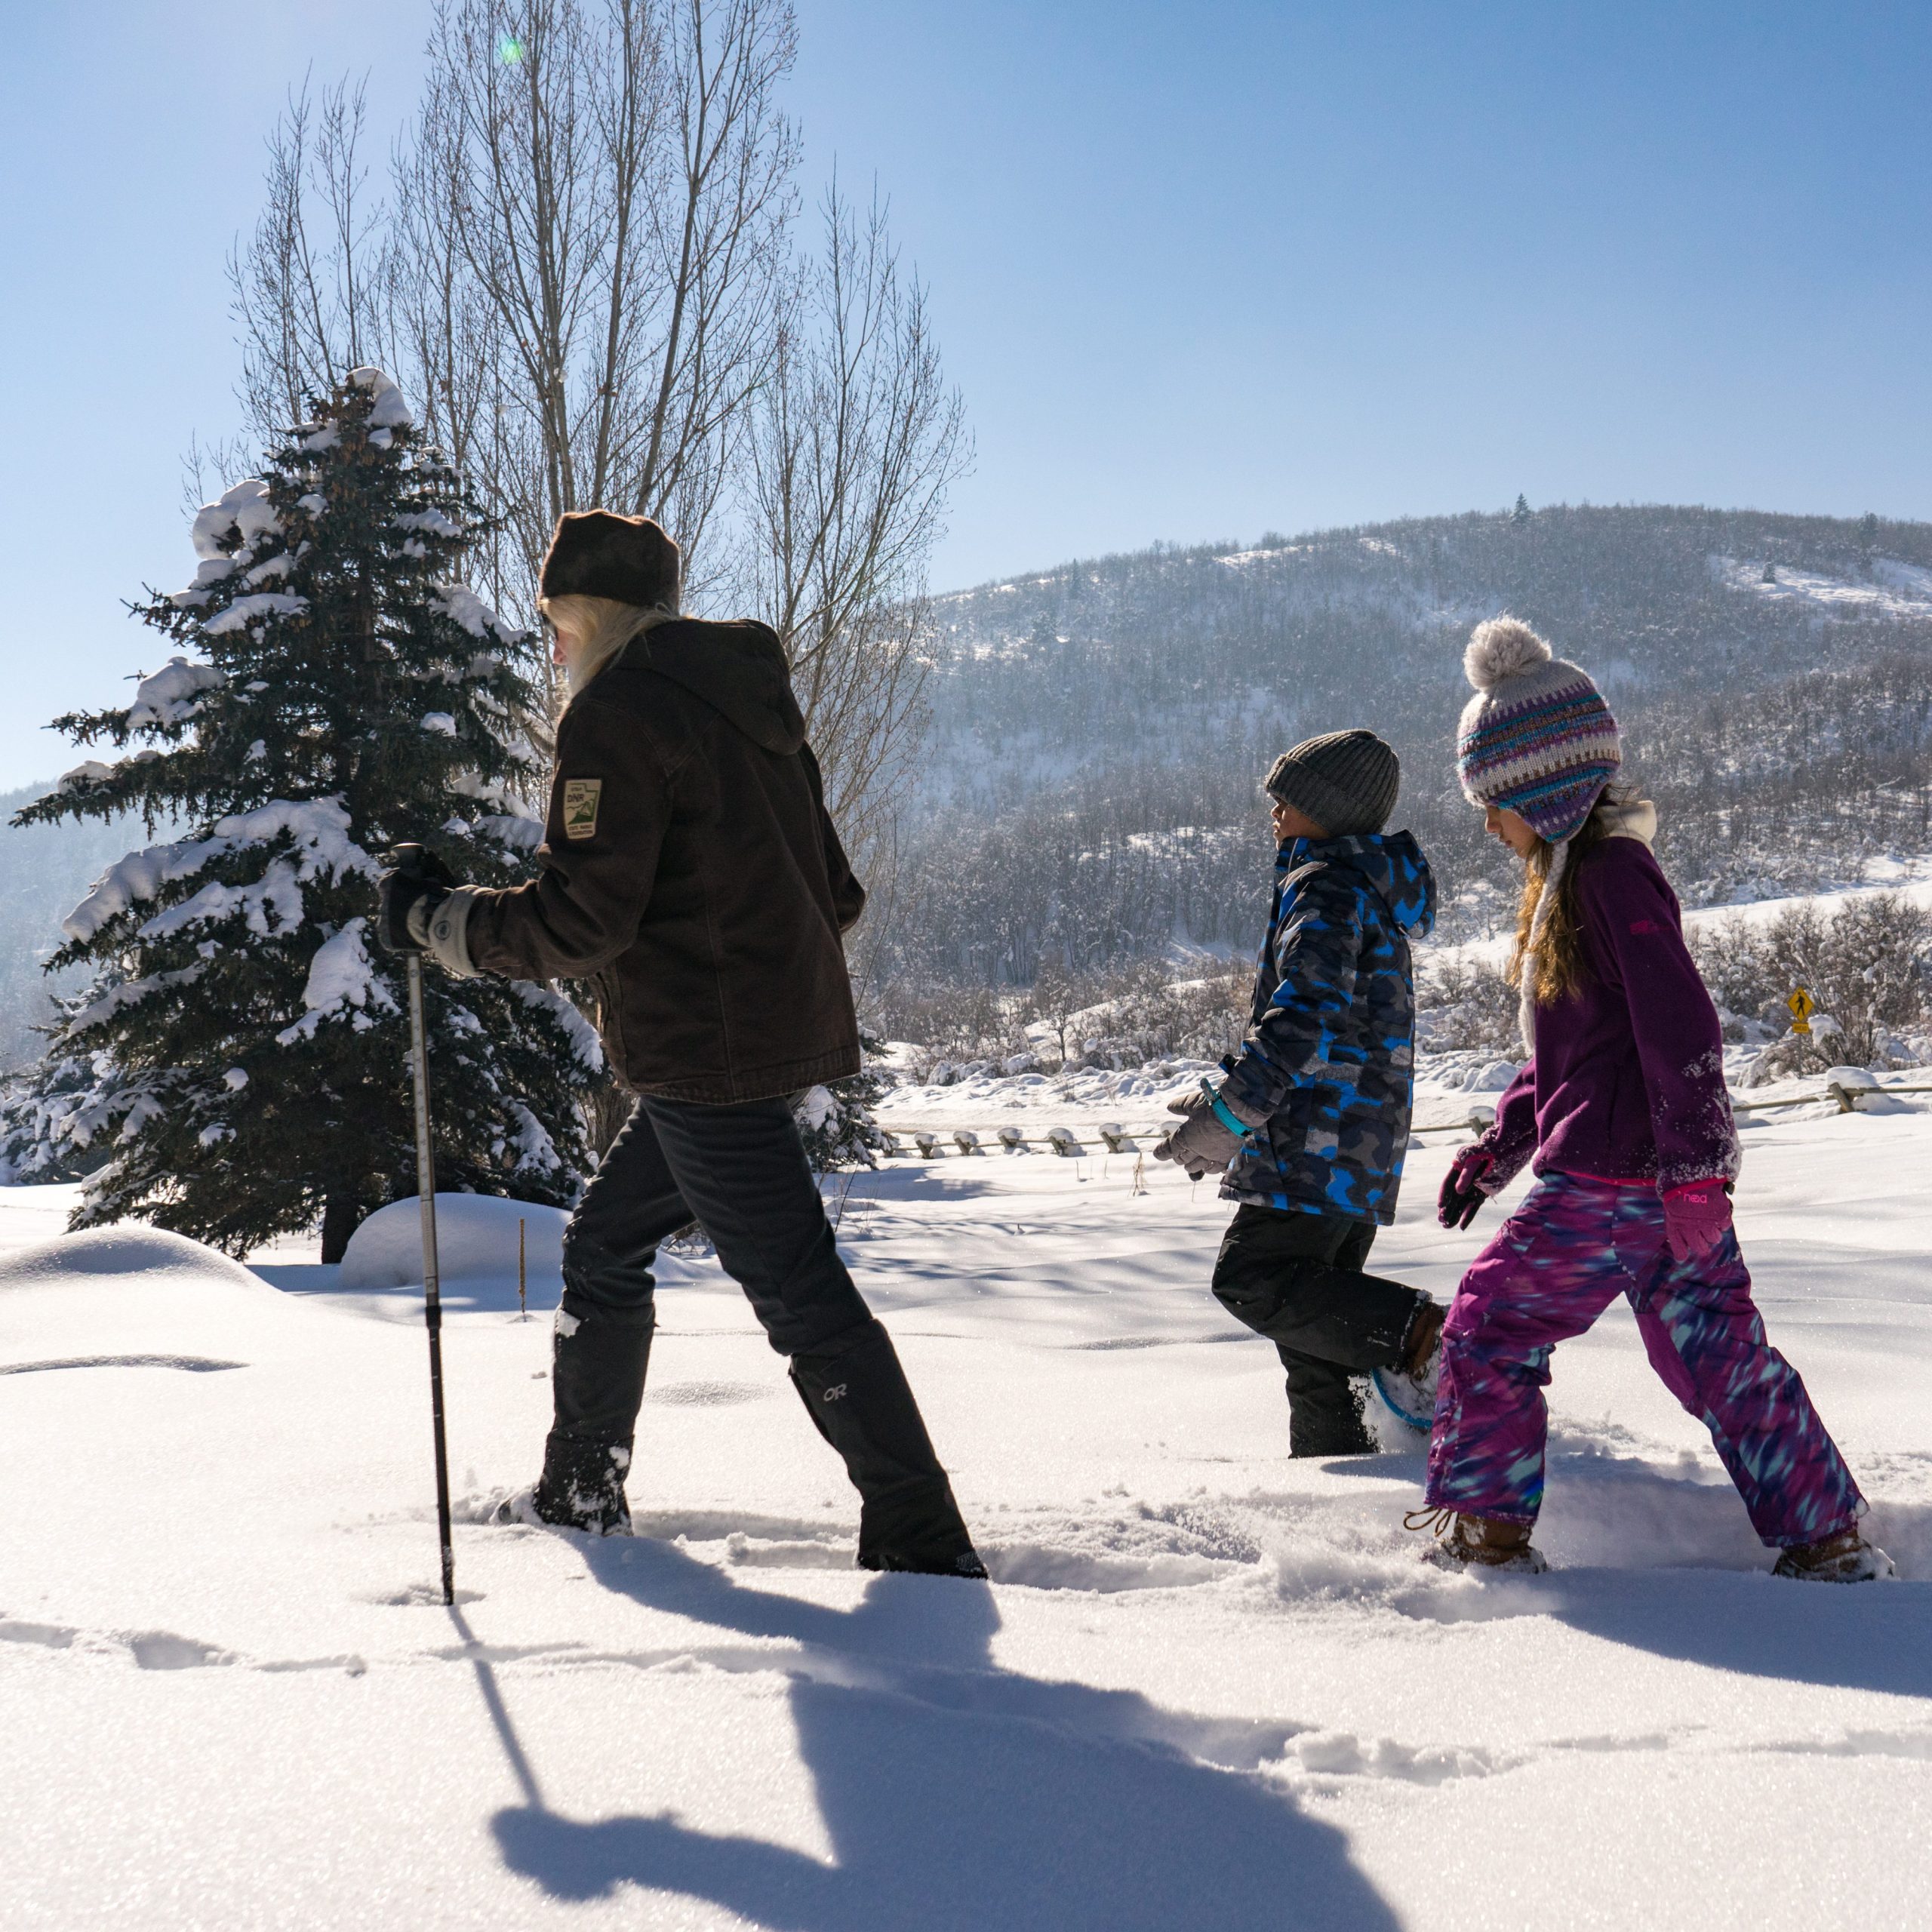
A peaceful blanket of snow covering a stunning Utah landscape is something everyone ought to experience at least once! From snowmobiling to backcountry skiing, there are countless ways to enjoy our frigid wonderland. But winter hiking might seem a little intimidating if you haven’t done it before.
We’re here to help put your mind at ease with ten tips for trekking in the snow!
- PREPARE
- PICK YOUR PATH
- GEAR UP
- DRESS FOR THE WEATHER
- BRING A FRIEND
- CHECK WITH MOTHER NATURE
- TELL SOMEONE YOUR PLAN
- UNDERSTAND HYPOTHERMIA
- KNOW THE SIGNS OF FROSTBITE
- TAKE A HIKE
1. Prepare!
If you’re an avid hiker in other seasons, you might be used to spontaneous hikes—but spontaneity is not such a great idea in the winter. Planning ahead for winter hikes ensures you have the appropriate gear and resources to have a safe trip. And if you’re apprehensive about it, planning ahead will help alleviate those nerves!
2. Pick Your Path!
If you’re new to winter hiking, start small. Hiking in the snow will take longer. You tend to move slower and might encounter more obstacles in your path. A two-hour hike you’ve done in the summer might take you four or five hours on the same trail in the snow.
So what’s a good first hike? We recommend choosing a trail you’ve hiked before. Your prior experience on the trail will help you.
Be mindful that there are fewer daylight hours in the winter. Try to time your hike for when the sun is highest in the sky—that’s when temperatures will be the warmest. Temperatures can drop quickly as soon as the sun slips behind the mountains and the trail becomes shady. If you plan on being out at sunset, stay close to the trailhead and pack extra layers.
PRO TIP: Choose trails with some uphill areas to get the blood moving and help keep you warm.
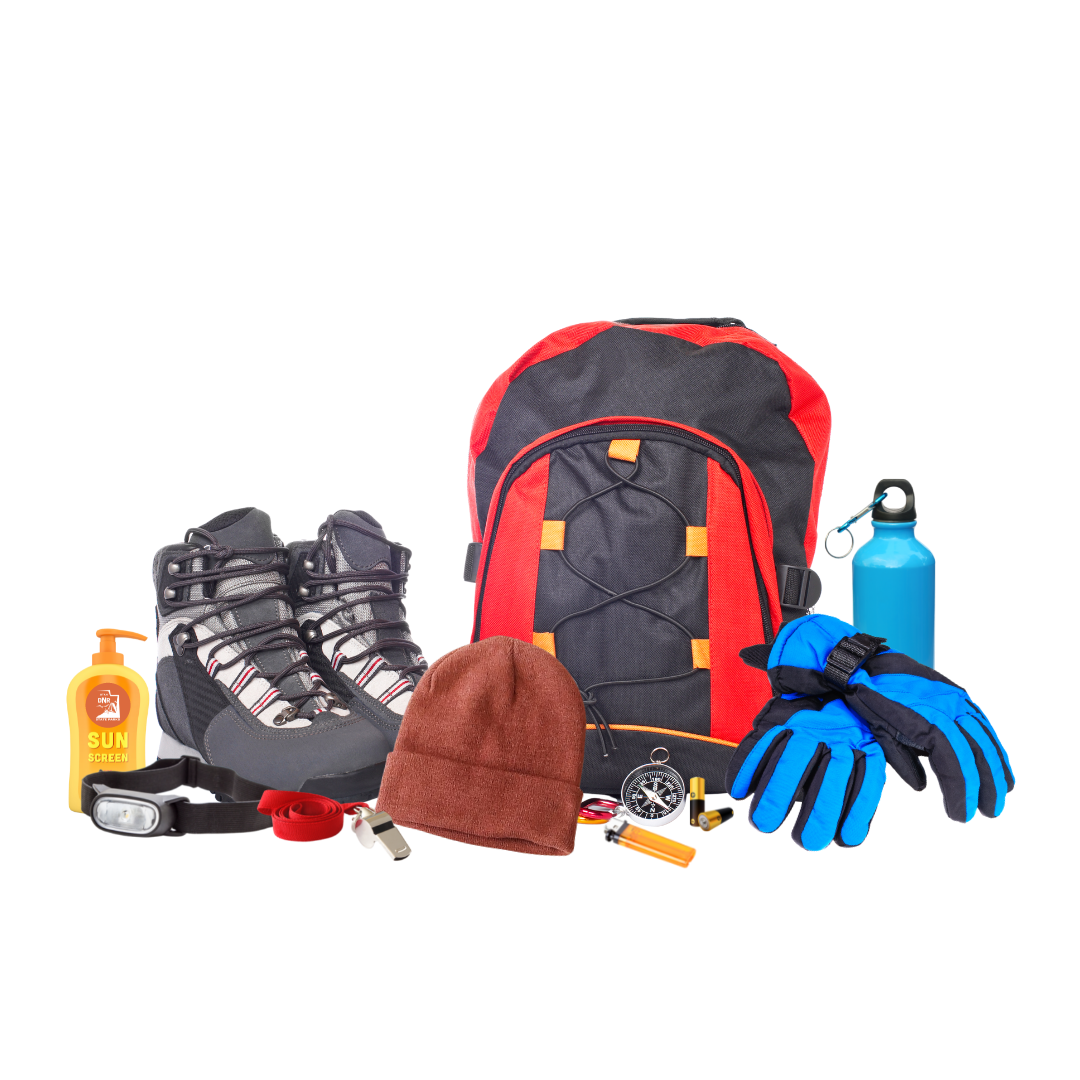
3. Gear Up!
So what will you need on a winter hike? This certainly isn’t an all-inclusive list, but we’ll cover the most important stuff.
BACKPACK: You don’t need a special hiking pack for winter—just something large enough to carry your gear and extra layers. Nice features to look for:
- An interior pocket or sleeve for a hydration pack. Look for one with an insulated drinking tube to help keep the water from freezing
- A hip belt that will place the load on your hips rather than your shoulders
- A sternum strap that prevents the pack from shifting while you are hiking
SUNSCREEN: You can still get a nasty sunburn in the winter. Sunlight reflects harshly off the snow and you can burn quickly. Protect yourself with at least UPF 30, and reapply as needed. Don’t forget sunglasses to protect your eyes!
PHONE: Plan on carrying your cell phone, satellite phone, or other communication devices with you on your hike. You’ll want a way to call for help if you get in a bind. Use your phone only as a communication device. Try to conserve your phone’s battery instead of using it as a flashlight or map, and make sure to charge your batteries before you head out.
Carry your devices in your backpack in a pocket near your body—this will keep everything warm, safe, and dry. It’ll also keep the battery from draining as quickly in the cold weather. Even when a cell phone is not in its coverage area (or the signal is too weak to make a call or send a text), it still “pings” towers in the area. Search and rescue teams can use your last cell phone location to start a search in your last known location if you don’t return on time.
NAVIGATIONAL TOOLS: There are a lot of great trail apps out there to help you find your way. Some will even show your location in real-time on the map—but you should definitely have a backup in this case. You never know when you might lose service, your battery might die, or your phone could get damaged, lost, or broken. Even if you have a handheld GPS device, pack a waterproof, tear-proof map and a compass to help you find your way. Never rely solely on battery-operated gear.
WATER: In any weather, staying well hydrated is one of the most important components of a hike. Bonus: you feel better when you’re properly hydrated! If your backpack has a hydration sleeve, you’re set. For longer hikes, you can also throw a couple of extra water bottles in the side pockets or bring a water bottle with a filter. Carry water in insulated containers to keep it from freezing. In a pinch, wrap your water bottle in a wool sock before putting it into your backpack. Dehydration speeds up the onset of hypothermia, so stay hydrated. If you feel thirsty, you’re already dehydrated.
SNACKS: Exercising in the winter burns more calories, since your body is working hard to stay warm, too. Pack easy-to-eat snacks that are high in protein and carbs to keep your energy up. Dehydrated meals are handy if you’re planning to be out longer and want to pack light. Be sure to take extra food in case of an emergency. Staying nourished will help you stay warm.
FIRST AID KIT: You might not need it, but you’ll be glad you have it. It’s worth investing in a kit that at least has the basics for dealing with a minor injury. Familiarize yourself with what’s inside the kit beforehand and add anything you think you might need. We recommend adding a small lighter and waterproof matches in case you find yourself in a dangerous situation and need to build a fire. You should also have an emergency whistle that you can use if you need to get someone’s attention.
HEADLAMP/FLASHLIGHT: Remember, it’s going to get dark earlier. You need a headlamp or a flashlight with you in case you get caught on the trail in dark or low-light conditions. Headlamps are nice because they are hands-free. Either way, make sure the batteries are charged.
BATTERIES: Be prepared for your devices to malfunction at colder temperatures. Make sure everything is fully charged before you head out. Bring extra batteries or battery charging packs as backups. Keep your phone and other devices safely stored in your backpack to keep them warm. Do not rely solely on your phone.
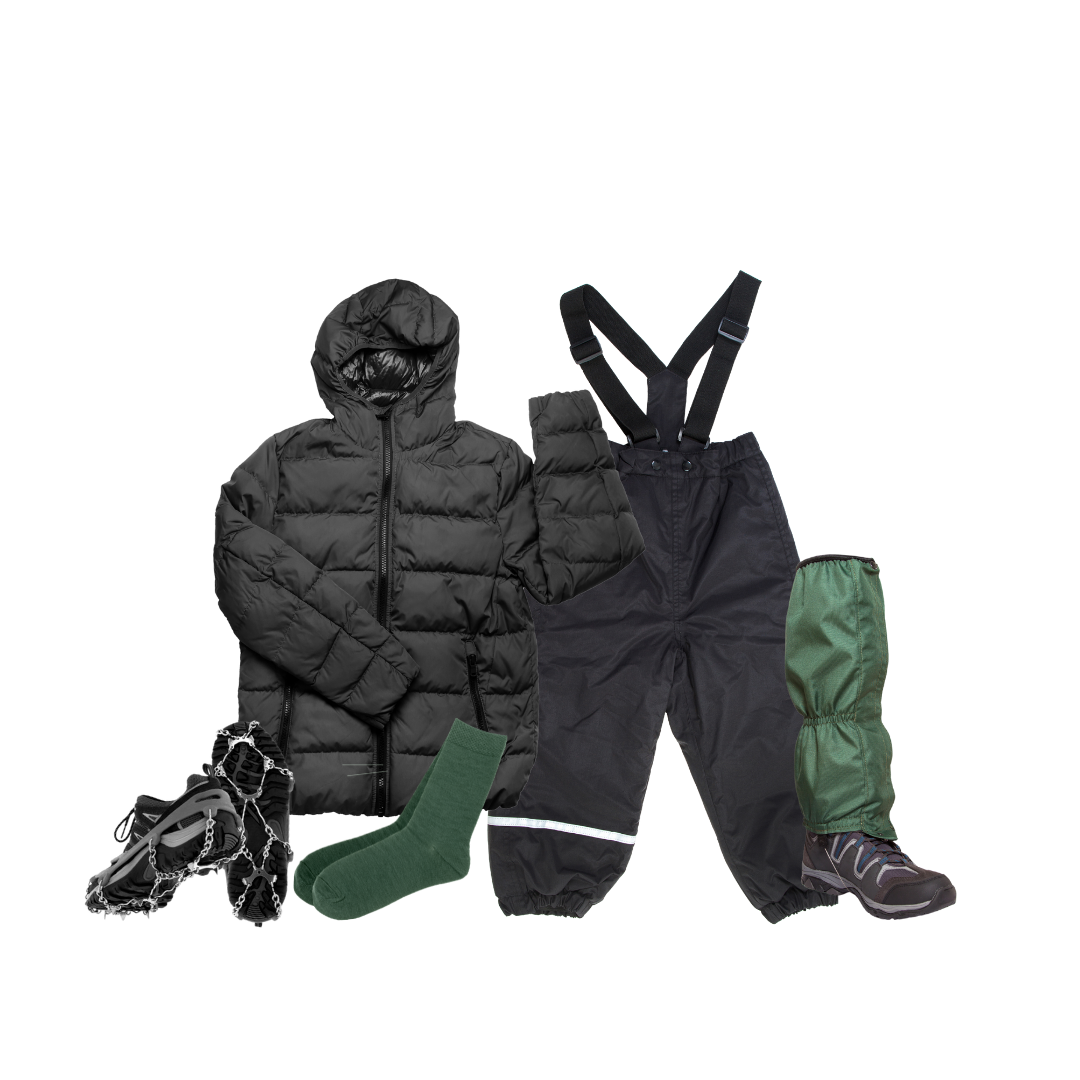
4. Dress for the weather!
TOPS: The key to winter hiking is staying WARM and DRY. It’s recommended that you wear three layers:
- Base Layer
- Insulating Layer
- Shell
If you start to get hot, remove a layer before you get sweaty. Do not wear cotton. Opt for synthetic fabrics that wick moisture and are quick-drying.
BOTTOMS: If temps are low or the weather looks snowy, consider wearing a base layer with a waterproof layer over the top.
GLOVES: Always pack a pair of gloves. There are a lot of toasty, yet lightweight options that won’t take up much space when you’re not using them.
HAT: A hat is a necessity! Did you know you lose a considerable amount of heat through the top of your head? Even if you don’t think you’ll need it, packing a breathable hat is the smart thing to do.
BOOTS: If you’ve already got waterproof hiking boots with good traction, just pair them with a thermal sock to keep those feet nice and warm. If you’re going to be doing a lot of winter hiking, it might be worth investing in pair of insulated winter hiking boots. Throw an extra pair of socks in your pack—just in case.
MICROSPIKES: These handy little devices are a fantastic way to gain a little more traction on a slippery trail. They’re made of tiny spikes on chains that slip over your boot. If you’re planning on hiking a trail with steeper inclines, you should opt for crampons over microspikes. They’re more robust and have bigger spikes, but you can still remove them when you don’t need them.
GAITERS: Not a necessity, but a convenient way to keep the snow from getting into your boots. If you’re trekking through snow that’s deep enough, throw a pair of gaiters over the top of your boots and pants to keep things warm and dry. If you don’t need them, they can easily be folded and stored in your backpack.
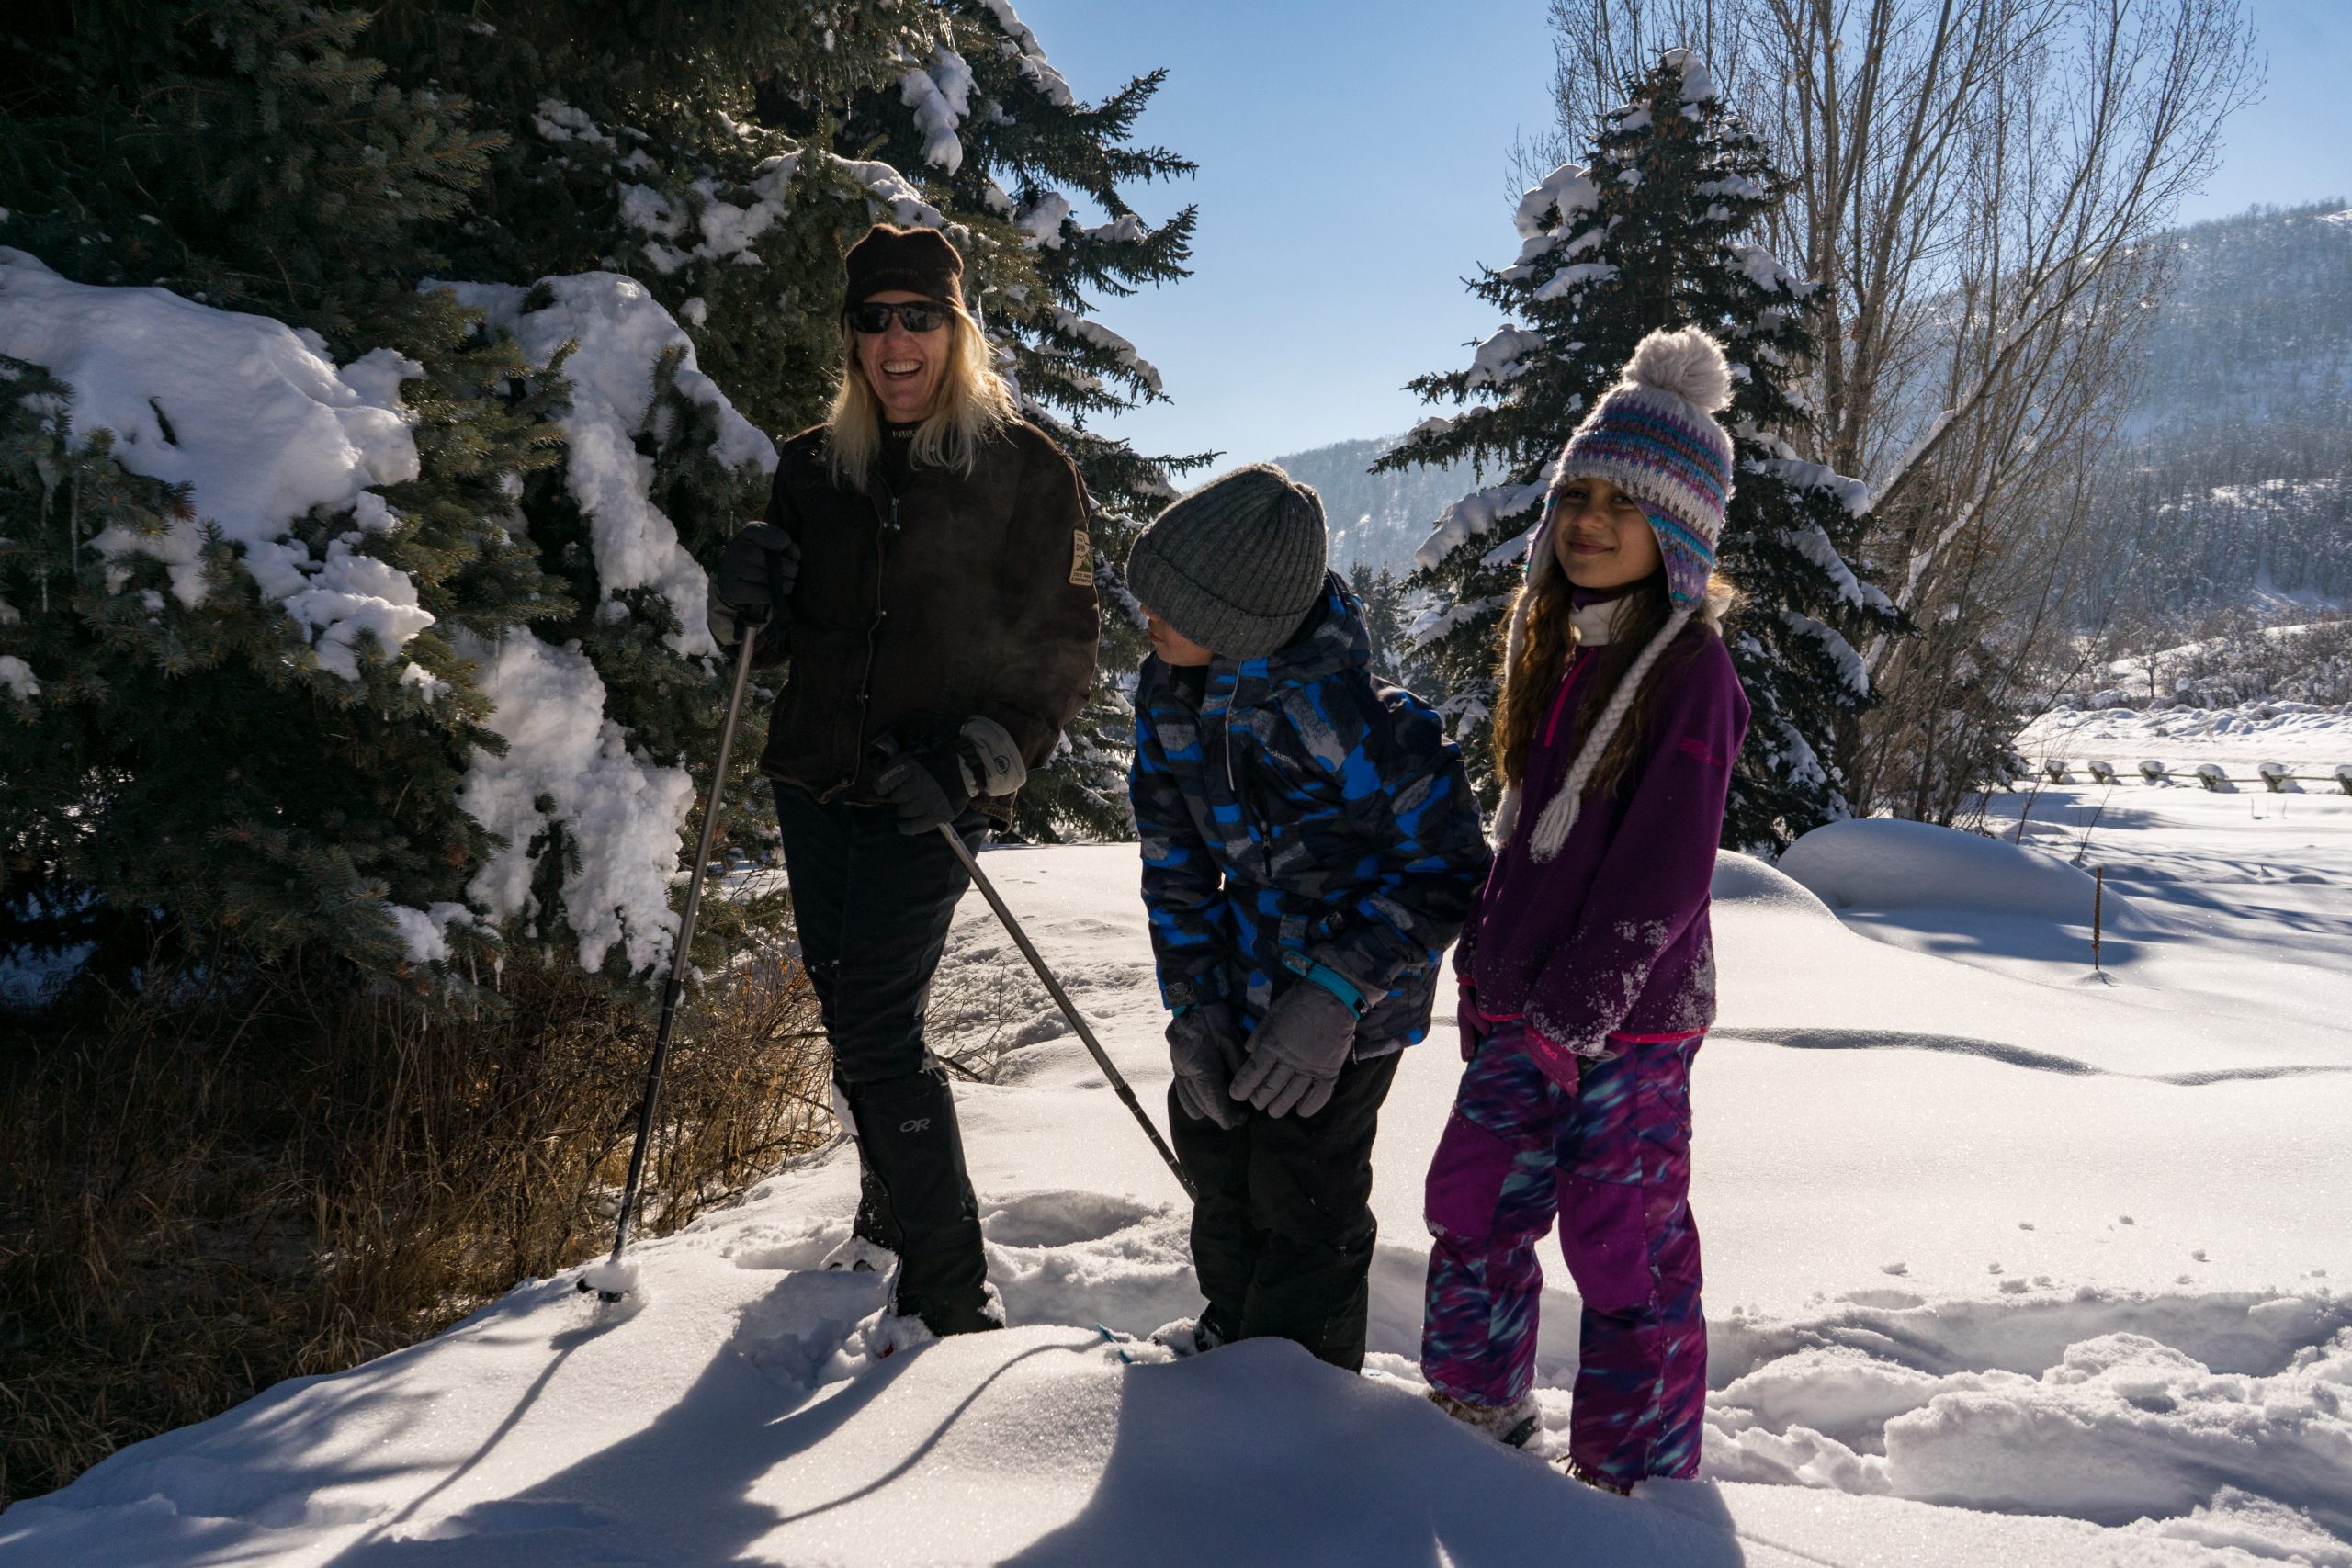
5. Bring a friend!
Bring a friend! Don’t go it alone—especially if this is your first time trying a winter hike. Not only is it nice to have company, but it’s also good to have someone there if something goes wrong.
6. Check with Mother Nature!

Check the weather conditions where you’ll be hiking BEFORE leaving the house. Weather can be unpredictable and can change quickly in the winter. Remember to take shorter daylight hours into account and check avalanche advisories, if applicable. When in doubt, don’t go out. Do not take risks when it comes to avalanches, snow, and ice.
For easy and instant access, download an avalanche app such as the Utah Avalanche Center (iOS only) or Avalanche Forecasts (iOS and Android).
7. Tell someone your plan!
Make sure someone knows where you’re headed, who you’ll be with, and your estimated return time. If possible, keep your contact updated if anything changes. This gives search and rescue personnel an idea of your location in the event of an emergency.
8. Understand Hypothermia!
It’s a big, scary word for a reason. When you get hypothermia, your core temperature drops to a level where normal brain and muscle function is no longer possible. Remember, when you’re out hiking, it is important to stay warm and dry. Certain conditions, like fatigue, exhaustion, dehydration, drinking alcohol, or inadequate food intake can worsen your chances of developing hypothermia. Learn the warning signs before you go:
- Uncontrollable/violent shivering
- Fumbling/lethargy
- Slurred speech/inability to communicate
If you see any warning signs of hypothermia, seek immediate emergency assistance.
9. Know the signs of frostbite!

When your body gets extremely cold, your blood vessels constrict, diverting blood to your core to keep you warm. This means you aren’t getting enough blood to your extremities. The lack of blood flow can cause numbness, pain, and eventually skin tissue death.
This probably isn’t a major concern on a short day-hike, but it’s still a good idea to keep an eye out for early signs of frostbite:
- Skin that feels firm/waxy
- Numbness
- White/gray skin that has a yellowish tint
If you see signs of frostbite, it’s important to warm your skin up gradually and keep the area dry. Seek medical assistance.
10. Take a hike!
No, really! You’re ready! All that planning will be worth it the moment you hit the trail. You know your stuff, the gear is packed, the weather is perfect, and now it’s time to enjoy your hike! Some last bits of advice as you head out the door:
- Pay close attention to your surroundings. It’s easy to metaphorically get lost in the beauty—just make sure you’re aware of yourself and where you are.
- Trust your gut. If something doesn’t feel safe, it probably isn’t.
- Don’t push yourself beyond your abilities. Turn back if trail or weather conditions become unsafe.
- Just because you see footprints or other people on a trail doesn’t mean it’s safe. Do not take risks when it comes to snow/ice travel.
We hope you feel more confident to get out there and explore Utah in the snow. Happy hiking!
BONUS: Remember to Stay Safe on Ice!
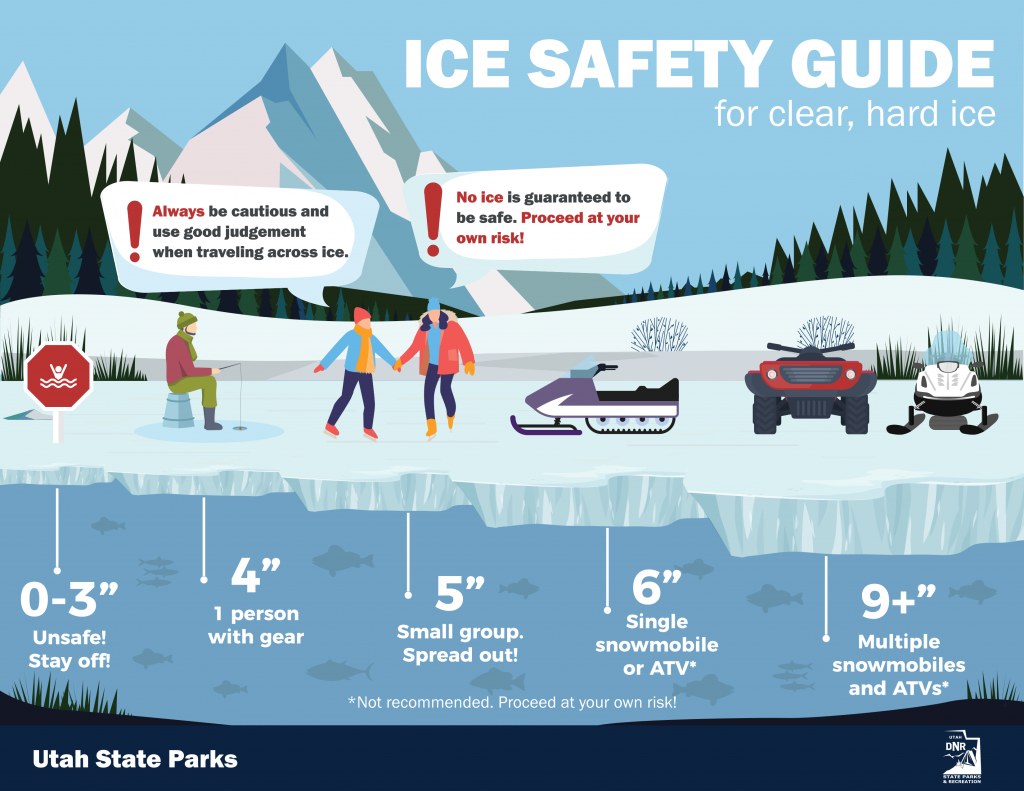
Falling through the ice and into cold water can put you in an extremely dangerous situation. It is important to be extra careful whenever you head out onto the ice.
Before planning an ice fishing trip, or whenever you’re thinking of going onto the ice, it is important to consider some ice safety tips to help ensure everyone has a safe and enjoyable time.
Check out our ice safety graphic, as well as visit our ice safety page to learn more!
If you found this blog entry interesting, please consider sharing it through your social network.